Spooky Halloween Whoopie Pies to Try Now

If you’re ready to impress your friends and family with a delightfully spooky dessert, look no further than these Halloween Whoopie Pies. Halloween Whoopie Pies combine creepy flavors and festive fun to create a perfect treat for your haunting holiday celebrations. These soft, cake-like cookies sandwich a luscious filling that will have everyone coming back for more. Whether you’re hosting a party or looking for a fun baking project, these pies are the ultimate way to embrace the spirit of Halloween with every bite.
Why You’ll Love This Recipe
- Perfectly Festive: The spooky colors and flavors add a festive touch to your Halloween menu.
- Soft and Chewy Texture: The pillowy cake cookies balance beautifully with the creamy filling.
- Kid-Friendly Fun: Decorating is easy and enjoyable for little helpers in the kitchen.
- Customizable Flavors: You can switch up the filling or cake base to match your mood or dietary needs.
- Great for Parties: They’re bite-sized and mess-free, making them perfect party treats or lunchbox surprises.
Ingredients You’ll Need
The ingredients for Halloween Whoopie Pies are simple yet essential to creating the perfect texture, taste, and eerie appearance. Each component plays a unique role—from the spices in the cake to the creamy filling that holds everything together.
- All-Purpose Flour: Provides the structure for soft, cakey cookies that aren’t too dense or crumbly.
- Cocoa Powder: Adds rich chocolate flavor and a dark base that enhances the spooky look.
- Granulated Sugar: Sweetens while contributing to that tender crumb texture.
- Butter: Gives moisture and a luscious richness to the cookie part of the pies.
- Eggs: Bind everything together and provide lift for a fluffy cookie.
- Heavy Cream or Cream Cheese: Creates the smooth and creamy filling with a slight tang.
- Vanilla Extract: Adds warmth and depth to both the filling and cake layers.
- Food Coloring (Orange, Green, Purple): Introduces vibrant, Halloween-themed colors to the filling or cake batter.
- Pumpkin Pie Spice or Cinnamon: Infuse seasonal aromatics that evoke the essence of fall.
- Baking Soda and Baking Powder: Essential leavening agents that ensure a tender rise in the whoopie pies.
Variations for Halloween Whoopie Pies
One of the best things about Halloween Whoopie Pies is how easy they are to personalize. Whether you’re craving something dairy-free or want a flavor twist, these variations can easily fit your needs and preferences.
- Pumpkin Spice Swap: Add canned pumpkin and replace some flour for a moist pumpkin-flavored cookie with cozy spices.
- Vegan Version: Use flax eggs and dairy-free cream cheese to make a plant-based treat everyone will love.
- Minty Madness: Incorporate peppermint extract and green food coloring for a refreshing twist.
- Red Velvet Style: Swap cocoa powder for red food coloring and add a hint of vinegar to brighten the flavors.
- Peanut Butter Filling: Mix peanut butter into the filling for a rich, nutty surprise inside each pie.

How to Make Halloween Whoopie Pies
Step 1: Prepare the Batter
Start by whisking together your dry ingredients—flour, cocoa powder, baking soda, baking powder, and spices—in a bowl. In a separate bowl, cream butter and sugar until light and fluffy, then add eggs one at a time. Slowly alternate adding the dry ingredients and any liquid like vanilla extract or pumpkin puree, mixing just until combined.
Step 2: Bake the Cookies
Using a spoon or piping bag, drop the batter onto lined baking sheets in evenly sized dollops. Bake at the recommended temperature until the cookies spring back when touched, which usually takes 10-12 minutes. Allow them to cool fully before moving to filling.
Step 3: Prepare the Filling
Beat together cream cheese or heavy cream, powdered sugar, and vanilla extract until smooth and fluffy. If desired, mix in your chosen food coloring to fit your Halloween theme. Chill the filling briefly to help it firm up for spreading.
Step 4: Assemble the Whoopie Pies
Pair up the cookie rounds by size, then spread or pipe a generous dollop of filling onto one cookie and top with the other. Gently press together to make a sandwich. For extra fun, roll edges in sprinkles or crushed candy to add texture and flair.
Pro Tips for Making Halloween Whoopie Pies
- Even Sizing: Use a cookie scoop to ensure all pies are uniform and bake evenly.
- Don’t Overmix: Mix batter just until combined to keep cookies tender and light.
- Cool Completely: Always let the cookies cool fully before assembling to prevent filling from melting.
- Use Parchment Paper: Prevents sticking and makes cleanup simple while baking.
- Customize Colors Last: Add food coloring to filling after whipping to control intensity easily.
How to Serve Halloween Whoopie Pies
Garnishes
Enhance the creepy charm by garnishing with edible eyeballs, black sprinkles, or crushed candy corn around the edges of your Halloween Whoopie Pies. A drizzle of colored icing or a dusting of powdered sugar can also add an eerie ambiance that’s sure to wow guests.
Side Dishes
Serve these delicious treats alongside a warm mug of spiced cider, pumpkin latte, or even a cold glass of milk to balance the rich sweetness of the pies. For a complete celebration, add some caramel apples or cinnamon popcorn for crunchy contrast.
Creative Ways to Present
Arrange the Halloween Whoopie Pies on a tiered cake stand decorated with fake spider webs or autumn leaves. You can also pop them on skewers or surround them with cranberries and mini pumpkins to make an irresistible Halloween centerpiece.
Make Ahead and Storage
Storing Leftovers
Keep leftover Halloween Whoopie Pies in an airtight container in the refrigerator for up to 3 days to maintain freshness and texture.
Freezing
For longer storage, place assembled whoopie pies on a tray to freeze individually before transferring to a freezer-safe bag. They’ll keep well frozen for up to 2 months and can be thawed overnight in the fridge.
Reheating
Since these pies are best served chilled or at room temperature, avoid microwaving as it can soften the cookies too much. Instead, let frozen pies thaw fully, then bring to room temperature before enjoying.
FAQs
Can I use different fillings for Halloween Whoopie Pies?
Absolutely! Feel free to experiment with cream cheese frosting, marshmallow fluff, or even buttercream to customize your pies.
Are Halloween Whoopie Pies gluten-free?
They can be! Substitute all-purpose flour with a gluten-free blend to make the recipe friendly for gluten-sensitive guests.
How long do Halloween Whoopie Pies last?
Stored properly in an airtight container, they stay fresh for about 3 days in the refrigerator, making them great for prepping ahead.
Can I make Halloween Whoopie Pies ahead of time?
Yes, you can bake the cookie layers and prepare the filling in advance; just assemble shortly before serving for best results.
What’s the best way to get the filling really fluffy?
Use chilled cream or cream cheese and whip on high speed until stiff peaks form, then add sugar and vanilla gradually for a light, airy filling.
Final Thoughts
If you want a show-stopping, crowd-pleasing treat this Halloween, Halloween Whoopie Pies are a must-try. They blend irresistible flavors, fun designs, and comfy textures that make celebrating even sweeter. So grab your mixing bowls and start baking—your spookiest, tastiest holiday dessert awaits!
Related Posts
- Why Hawaiian Banana Bread Is a Must-Try Treat
- Irresistible Fig and Goat Cheese Puff Pastry Delight
- How to Make Perfect Espresso Brownies
Halloween Whoopie Pies
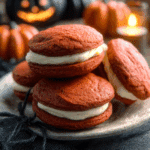
Halloween Whoopie Pies are soft, cake-like chocolate cookies sandwiched with a luscious, creamy filling colored in festive Halloween hues. Perfectly chewy with a rich flavor and customizable to suit different diets and tastes, these bite-sized treats are ideal for parties, family gatherings, or fun seasonal baking projects. Featuring spooky colors and seasonal spices, they bring festive charm and cozy fall flavors to your Halloween celebrations.
- Prep Time: 20 minutes
- Cook Time: 12 minutes
- Total Time: 40 minutes
- Yield: 12-16 whoopie pies 1x
- Category: Appetizers
- Method: Baking
- Cuisine: American
- Diet: Gluten Free (with substitution)
Ingredients
Dry Ingredients
- 2 cups All-Purpose Flour
- 1/2 cup Cocoa Powder
- 1 teaspoon Baking Soda
- 1 teaspoon Baking Powder
- 1 teaspoon Pumpkin Pie Spice or Cinnamon
- 1 cup Granulated Sugar
Wet Ingredients
- 1/2 cup Butter, softened
- 2 Eggs
- 1 teaspoon Vanilla Extract
- Optional: Canned Pumpkin (for pumpkin spice variation)
Filling
- 8 oz Cream Cheese or 1 cup Heavy Cream
- 1 cup Powdered Sugar (for sweetness, quantity adjustable)
- 1 teaspoon Vanilla Extract
- Food Coloring (Orange, Green, Purple) as desired
- Optional: Peanut Butter (for peanut butter filling variation)
Instructions
- Prepare the Batter: Whisk together dry ingredients — all-purpose flour, cocoa powder, baking soda, baking powder, and pumpkin pie spice or cinnamon — in a bowl. In a separate large bowl, cream the softened butter and granulated sugar until light and fluffy. Add eggs one at a time, beating well after each addition. Gradually alternate adding the dry ingredients mixture and any liquids such as vanilla extract or canned pumpkin, mixing just until combined. Avoid overmixing to keep the batter tender.
- Bake the Cookies: Preheat oven to 350°F (175°C). Line baking sheets with parchment paper. Using a spoon or piping bag, drop the batter in evenly sized dollops onto the sheets. Bake for 10-12 minutes or until the cookies spring back when lightly touched. Remove from oven and allow cookies to cool completely on wire racks before filling.
- Prepare the Filling: Beat together cream cheese or heavy cream, powdered sugar, and vanilla extract until smooth and fluffy. If using heavy cream, whip until stiff peaks form before folding in sugar and vanilla. Add desired food coloring to create festive Halloween colors. Optionally, incorporate peanut butter or peppermint extract for flavor variations. Chill the filling briefly to firm up for easier spreading.
- Assemble the Whoopie Pies: Pair cookies by size. Spread or pipe a generous dollop of filling onto one cookie and sandwich with its partner. Gently press together to seal. For added fun, roll edges in sprinkles or crushed candy. Keep assembled pies chilled until ready to serve.
Notes
- Use a cookie scoop to ensure uniform size for even baking.
- Mix the batter only until just combined to maintain a tender, light texture.
- Allow cookies to cool completely before assembly to prevent filling from melting.
- Line baking sheets with parchment paper to prevent sticking and simplify cleanup.
- Add food coloring to the filling after whipping to easily control intensity and achieve vibrant colors.
- These pies can be customized with different fillings like marshmallow fluff, buttercream, or flavored extracts.
- For gluten-free versions, substitute all-purpose flour with a gluten-free baking blend.
- Store leftover pies in an airtight container in the refrigerator for up to 3 days.
- Freeze assembled whoopie pies individually on a tray before transferring to freezer bags for up to 2 months.
- Thaw frozen pies overnight in the refrigerator and bring to room temperature before serving.
Nutrition
- Serving Size: 1 whoopie pie
- Calories: 220 kcal
- Sugar: 18g
- Sodium: 120mg
- Fat: 12g
- Saturated Fat: 7g
- Unsaturated Fat: 4g
- Trans Fat: 0g
- Carbohydrates: 26g
- Fiber: 2g
- Protein: 3g
- Cholesterol: 45mg
Keywords: Halloween, whoopie pies, spooky dessert, chocolate cookies, Halloween treats, festive baking, fall dessert, kid-friendly dessert