5 Irresistible Mini Cannoli Cups Recipes to Try

If you adore the classic Italian dessert but want a fun and handy twist, these Mini Cannoli Cups are exactly what you need. Discover 5 delicious Mini Cannoli Cups recipes that are easy to make and perfect for any occasion. These bite-sized delights combine the crispy, golden shell with a sweet, creamy ricotta filling that’s utterly irresistible. Whether you’re hosting a party or just craving a cozy homemade treat, these mini masterpieces bring unbeatable flavor and charm to your dessert table.
Why You’ll Love This Recipe
- Perfectly Portable: Mini Cannoli Cups offer all the classic flavors in an easy-to-hold bite-sized form, great for gatherings and kids alike.
- Customizable Flavors: You can tweak fillings and toppings easily, making every batch uniquely yours.
- Simple Ingredients: Using pantry staples and fresh dairy, these cups come together without complicated prep.
- Visual Appeal: Their charming presentation makes them a show-stopping dessert on any table.
- Quick to Assemble: Unlike traditional cannoli shells that require frying, these cups save time without sacrificing taste.
Ingredients You’ll Need
Using simple and fresh ingredients keeps these Mini Cannoli Cups light yet flavorful. Each component plays an important role, from crisp shells to the creamy, sweet filling that melts in your mouth.
- Pre-made Mini Tart Shells: Provides a sturdy, buttery base that holds the filling without sogginess.
- Ricotta Cheese: The star of the filling, offering a smooth, creamy texture and mild tanginess.
- Powdered Sugar: Adds sweetness without graininess for a silky smooth finish in your cream.
- Vanilla Extract: Enhances the flavor with warm, aromatic notes.
- Chocolate Chips or Chunks: Brings delightful bursts of sweetness and texture within each bite.
- Fresh Citrus Zest: A hint of lemon or orange zest brightens the filling with refreshing fragrance.
- Optional Nuts or Sprinkles: For added crunch and eye-catching decoration.
Variations for Mini Cannoli Cups
One of the best things about Mini Cannoli Cups is how easily you can tailor them to your taste or dietary needs. Play around with these ideas to make each recipe feel like your own special creation.
- Chocolate Ricotta Filling: Mix cocoa powder into the ricotta mixture for a rich, fudgy twist.
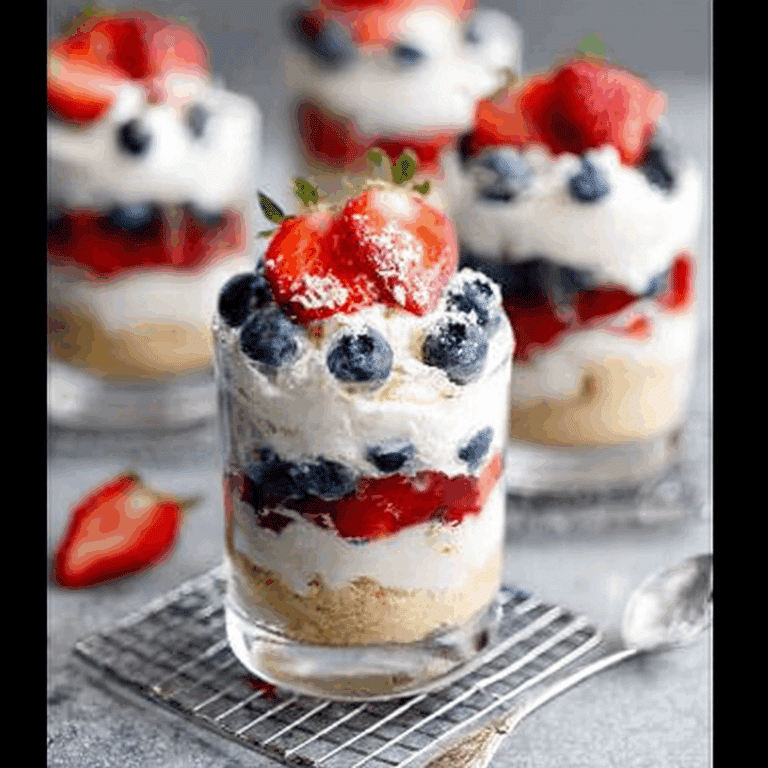
- Fruit-Infused Cups: Add chopped strawberries, blueberries, or candied orange peel for a fruity surprise.
- Nutty Delight: Fold in crushed pistachios or almonds for extra texture and flavor complexity.
- Gluten-Free Shells: Use gluten-free tart shells or make your own with almond flour to accommodate dietary restrictions.
- Vegan Alternate: Substitute traditional ricotta with coconut cream or cashew-based cheese for a dairy-free version.

How to Make Mini Cannoli Cups
Step 1: Prepare the Filling
Start by draining the ricotta cheese in a fine sieve or cheesecloth to remove excess moisture. Then in a mixing bowl, whip it with powdered sugar and vanilla extract until smooth and creamy. Fold in mini chocolate chips and citrus zest to boost flavor and texture.
Step 2: Fill the Tart Shells
Spoon or pipe the ricotta blend generously into each pre-made mini tart shell. Fill until the cups reach just below the rim, ensuring enough room for garnishes if desired.
Step 3: Garnish with Flair
Top each Mini Cannoli Cup with your choice of chopped nuts, extra chocolate chips, fresh berries, or a dusting of powdered sugar. Be creative and make it pop!
Step 4: Chill and Serve
Place the filled cups in the refrigerator for at least 30 minutes to let flavors meld and the filling to set slightly for perfect bite-sized enjoyment.
Pro Tips for Making Mini Cannoli Cups
- Drain Your Ricotta Well: Removing moisture prevents a watery filling and gives a thick, luscious texture.
- Use Fresh Zest: Grate your citrus zest freshly just before mixing for the most vibrant flavor and aroma.
- Pipe for Precision: Use a piping bag for neat, even filling in each cup without mess or overfilling.
- Keep Shells Crisp: Fill the cups just before serving to avoid soggy shells if made ahead.
- Experiment with Sweeteners: Try honey or maple syrup for a natural twist on the sugar in your filling.
How to Serve Mini Cannoli Cups
Garnishes
Simple additions like chopped pistachios, mini chocolate chips, or a light dusting of powdered sugar elevate the visual appeal and texture, making each Mini Cannoli Cup feel like a polished little jewel ready to impress.
Side Dishes
Pair these cups with a fresh fruit salad or a light espresso for a balanced dessert experience that harmonizes sweet and tangy elements on your palate.
Creative Ways to Present
Arrange Mini Cannoli Cups on a tiered dessert stand or place each in colorful mini cupcake liners for an inviting and festive vibe perfect for parties or special occasions.
Make Ahead and Storage
Storing Leftovers
Keep any leftover Mini Cannoli Cups covered in an airtight container in the refrigerator. Consume within 2-3 days to ensure shells remain somewhat crisp and the ricotta filling stays fresh.
Freezing
Freezing is not recommended for filled Mini Cannoli Cups because the texture of the ricotta cream and the shells may be compromised once thawed.
Reheating
Since these are best served chilled, reheating is not necessary. Allow refrigerated cups to come briefly to room temperature for the best flavor experience.
FAQs
Can I make Mini Cannoli Cups ahead of time?
You can prepare the filling and shells separately in advance, but it’s best to assemble right before serving to keep the shells crispy.
What can I substitute for ricotta cheese?
Mascarpone can be a richer substitute, or for a dairy-free option, try blending soaked cashews with a bit of coconut cream.
How do I keep the shells from getting soggy?
Fill Mini Cannoli Cups just before serving, and make sure to drain the ricotta well to reduce moisture.
Are these suitable for kids?
Absolutely! Their size and mild sweetness make them a kid-friendly treat, though watch for small nuts if you’re concerned about allergies.
Can I use homemade shells instead of pre-made?
Definitely, handmade shells add a unique touch and allow you to control ingredients, but pre-made shells save time and effort.
Final Thoughts
Mini Cannoli Cups are a delightful way to enjoy classic Italian flavors in a portable, charming package. Whether you stick to the traditional filling or try one of the exciting variations, these little treats are sure to bring smiles and sweet satisfaction. Give these recipes a whirl—you’ll quickly see why Mini Cannoli Cups are destined to become a new favorite!
PrintMini Cannoli Cups
Mini Cannoli Cups are a charming, bite-sized twist on the classic Italian dessert. Featuring crispy pre-made mini tart shells filled with a smooth, creamy ricotta mixture sweetened with powdered sugar, vanilla, chocolate chips, and fresh citrus zest, these easy-to-make cups are perfect for parties, family gatherings, or cozy homemade treats. Customizable, quick to assemble, and visually appealing, they deliver authentic cannoli flavor without the need for frying.
- Prep Time: 15 minutes
- Cook Time: 0 minutes
- Total Time: 45 minutes (including chilling time)
- Yield: 24 mini cups 1x
- Category: Dessert
- Method: No-bake assembly
- Cuisine: Italian
- Diet: Gluten Free (if using gluten-free shells)
Ingredients
Shells
- Pre-made Mini Tart Shells (about 24 shells)
Filling
- 1 ½ cups ricotta cheese, well drained
- ½ cup powdered sugar
- 1 teaspoon vanilla extract
- ⅓ cup mini chocolate chips or chunks
- 1 teaspoon fresh lemon or orange zest
Garnishes (Optional)
- Chopped pistachios, almonds, or other nuts
- Extra mini chocolate chips
- Fresh berries (strawberries, blueberries, etc.)
- Powdered sugar for dusting
Instructions
- Prepare the Filling: Drain the ricotta cheese thoroughly using a fine sieve or cheesecloth to remove excess moisture. In a mixing bowl, whip the ricotta with powdered sugar and vanilla extract until smooth and creamy. Fold in mini chocolate chips and freshly grated citrus zest to enhance flavor and texture.
- Fill the Tart Shells: Using a spoon or piping bag, fill each pre-made mini tart shell generously with the ricotta mixture. Fill just below the edge of the shells to allow space for garnishes.
- Garnish with Flair: Top each Mini Cannoli Cup with your choice of chopped nuts, extra chocolate chips, fresh berries, or a dusting of powdered sugar to add visual appeal and texture.
- Chill and Serve: Place the filled cups in the refrigerator for at least 30 minutes to let the flavors meld and the filling set slightly. Serve chilled for the best bite-sized enjoyment.
Notes
- Drain your ricotta well to prevent a watery filling and achieve thick, luscious texture.
- Use freshly grated citrus zest just before preparing the filling for vibrant aroma and flavor.
- Use a piping bag for neat, even filling and to avoid overfilling.
- Fill tart shells just before serving to keep them crisp and avoid sogginess.
- Experiment with natural sweeteners like honey or maple syrup instead of powdered sugar for variation.
Nutrition
- Serving Size: 1 mini cup
- Calories: 110
- Sugar: 7g
- Sodium: 40mg
- Fat: 6g
- Saturated Fat: 3.5g
- Unsaturated Fat: 2g
- Trans Fat: 0g
- Carbohydrates: 12g
- Fiber: 0.5g
- Protein: 3g
- Cholesterol: 15mg
Keywords: Mini Cannoli Cups, ricotta filling, Italian dessert, bite-sized dessert, easy cannoli recipe, no-fry cannoli


