No-Bake Protein Balls
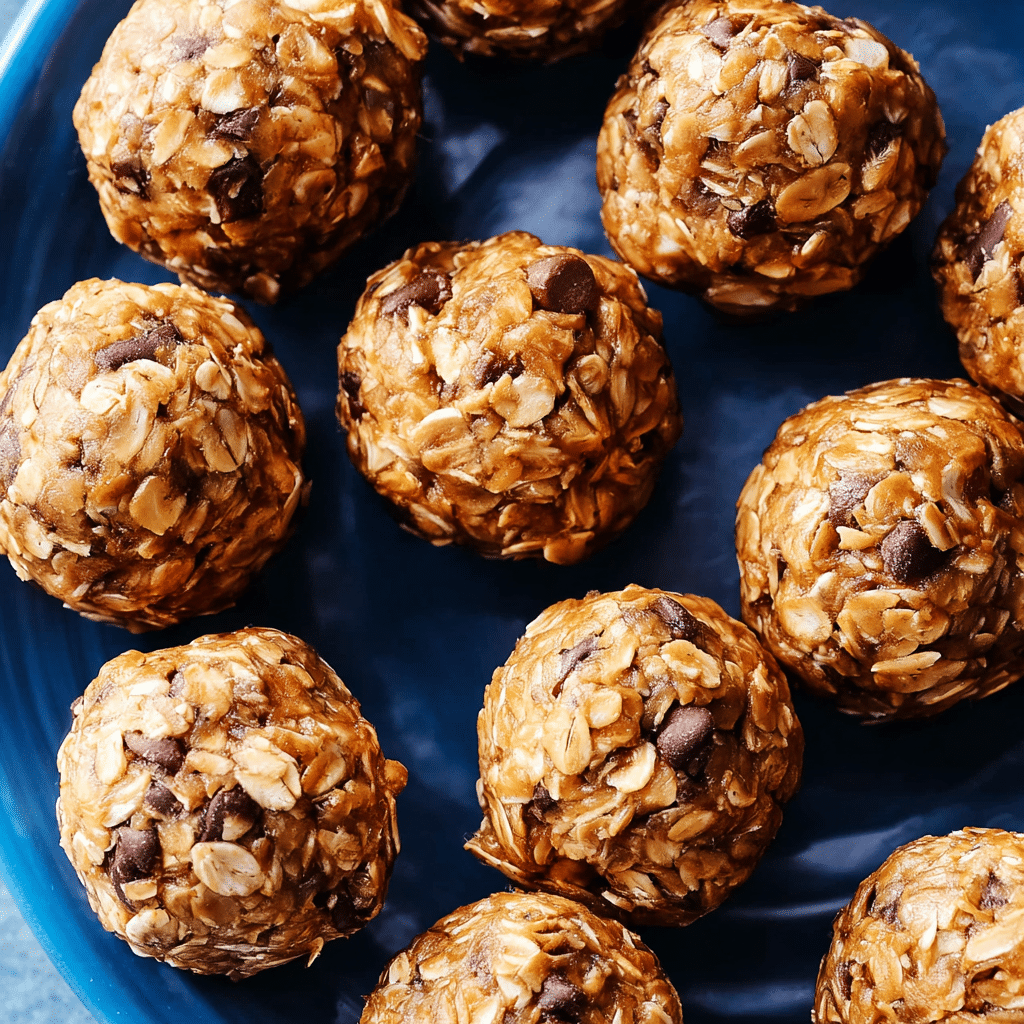
If you’re hunting for a quick, nutritious snack that keeps you energized throughout the day, these 5 easy no-bake protein balls are exactly what you need. Packed with wholesome ingredients, these no-bake protein balls combine flavor and convenience, making them perfect for busy mornings, post-workout refuels, or on-the-go munching. Ready in minutes and customizable to your taste buds, they deliver a powerful punch of protein and natural energy without any oven time.
Why You’ll Love This Recipe
- Effortless Preparation: No baking required means you can have a healthy snack in under 15 minutes.
- Nutritious Ingredients: Each bite is loaded with protein, fiber, and healthy fats to fuel your body.
- Customizable Flavors: Easily tweak ingredients to suit your dietary preferences and cravings.
- Portable and Convenient: Perfect for busy days, workouts, or when you need a pick-me-up.
- Kid-Friendly Snack: Naturally sweet and tasty bites that even picky eaters enjoy.
Ingredients You’ll Need
The beauty of these no-bake protein balls lies in their simplicity. Each ingredient is chosen not only to boost flavor but also to contribute to texture and nutritional balance—think creamy nut butters, chewy oats, and sweet natural binders.
- Rolled Oats: Acts as the perfect base and adds chewy texture and slow-release carbs.
- Nut Butters: Whether peanut, almond, or cashew, they offer creaminess and healthy fats.
- Honey or Maple Syrup: Natural sweeteners that help bind the mixture and add subtle sweetness.
- Protein Powder: Boosts protein content and keeps you full longer; choose plant-based or whey as preferred.
- Chia Seeds or Flaxseeds: Adds omega-3s, fiber, and a slight crunch for extra nutrition.
- Mix-ins: Options like mini dark chocolate chips, dried fruit, or shredded coconut for flavor bursts.
Variations for No-Bake Protein Balls
Feel free to make these no-bake protein balls uniquely yours by swapping or adding ingredients. Flexibility is key, and you can easily adjust based on what’s on hand or your dietary needs.
- Chocolate Lover’s: Add cocoa powder and mini chocolate chips for a rich, indulgent taste.
- Berry Burst: Toss in dried cranberries or freeze-dried blueberries for a fruity punch.
- Nut-Free Option: Use sunflower seed butter instead of nut butter to keep things allergy-friendly.
- Superfood Boost: Sprinkle in spirulina or matcha powder for an antioxidant-rich version.
- Spiced Delight: Mix cinnamon, nutmeg, or pumpkin pie spice for a cozy flavor profile.

How to Make No-Bake Protein Balls
Step 1: Combine Dry Ingredients
Start by gathering your dry ingredients such as rolled oats, protein powder, chia seeds, and any spices. Mix them thoroughly in a large bowl to ensure even distribution of flavors and textures.
Step 2: Add Wet Ingredients
In a separate bowl, stir together your nut butter and honey or maple syrup until smooth and creamy. This will act as the binding agent for the balls.
Step 3: Mix Everything Together
Gradually add the wet mixture to the dry ingredients, stirring until a sticky dough forms. If it feels too dry, add a little more nut butter or a splash of water to reach the right consistency.
Step 4: Add Mix-ins
Fold in your chosen extras like chocolate chips, dried fruits, or coconut flakes to bring additional texture and taste.
Step 5: Shape into Balls
Using your hands or a small cookie scoop, roll the mixture into evenly sized balls—about 1 inch in diameter works perfectly for snacking.
Step 6: Chill and Set
Place the balls on a parchment-lined tray and refrigerate for at least 30 minutes to firm up, which helps them hold together better when you grab them later.
Pro Tips for Making No-Bake Protein Balls
- Choose Your Protein Wisely: Use unflavored or mildly flavored protein powders to avoid overpowering the natural taste.
- Keep Ingredients at Room Temperature: This makes mixing easier, especially nut butters.
- Don’t Overmix: Stir until just combined to maintain a tender, slightly chewy texture.
- Roll Evenly: Uniform-sized balls ensure consistent bite and ease of storage.
- Store Properly: Keep them refrigerated to maintain freshness and prevent stickiness.
How to Serve No-Bake Protein Balls
Garnishes
Sprinkle a touch of shredded coconut, cocoa powder, or crushed nuts on the surface for a pretty and tasty finish that adds an extra layer of texture.
Side Dishes
Pair your protein balls with fresh fruit slices, a cup of yogurt, or a smoothie bowl for a balanced snack or mini-meal.
Creative Ways to Present
Wrap individual balls in parchment paper or place them in small reusable containers for grab-and-go snacking or thoughtful homemade gifts.
Make Ahead and Storage
Storing Leftovers
Store your no-bake protein balls in an airtight container in the refrigerator for up to one week to keep the texture firm and flavors fresh.
Freezing
If you want to prepare in bulk, freeze the balls by arranging them on a baking sheet, then transfer to a freezer bag once frozen. They’ll last up to three months and thaw quickly.
Reheating
Since these bites are best eaten chilled or at room temperature, simply let frozen protein balls thaw in the fridge or at room temperature before enjoying.
FAQs
Can I use other types of protein powder?
Absolutely! Whey, plant-based, collagen, or any protein you prefer will work as long as you adjust the texture with your binders accordingly.
Are no-bake protein balls suitable for vegans?
Yes, by using plant-based protein powder and swapping honey for maple syrup or agave, the recipe becomes entirely vegan.
How long do these protein balls last?
When refrigerated, they stay fresh for about a week. Freezing extends their shelf life to up to three months without sacrificing quality.
Can I add vegetables or super greens?
Yes! Adding small amounts of spinach powder, spirulina, or finely shredded zucchini can boost nutrition without compromising taste.
What if my mixture is too sticky or too dry?
If sticky, add more oats or protein powder; if dry, mix in a bit more nut butter or liquid sweetener until it forms a moldable dough.
Final Thoughts
These no-bake protein balls are a fantastic, easy way to fuel your day with wholesome ingredients and delicious flavors all rolled into one bite-sized snack. Whether you need a quick breakfast boost or a post-workout treat, give these recipes a try—you’ll wonder how you ever lived without them!
Related Posts
- Best Fish Batter for Golden Fillets Recipe
- How to Make Turkish Chicken Kabobs Perfectly
- How to Make Grilled Tuna Steaks with Mango Salsa
No-Bake Protein Balls

These 5 easy no-bake protein balls are a quick, nutritious snack packed with wholesome ingredients like oats, nut butters, and protein powder. Ready in under 15 minutes without any baking, they provide a powerful punch of protein and natural energy, perfect for busy mornings, post-workout refuels, or on-the-go munching. Customizable to your taste buds and dietary preferences, they make a convenient, kid-friendly treat loaded with fiber, healthy fats, and flavor.
- Prep Time: 10 minutes
- Cook Time: 0 minutes
- Total Time: 40 minutes (includes chilling time)
- Yield: 15 protein balls 1x
- Category: Appetizers
- Method: No-Bake
- Cuisine: American
- Diet: Gluten Free, Vegetarian
Ingredients
Base Ingredients
- 1 cup rolled oats
- 1/2 cup protein powder (plant-based or whey)
- 2 tablespoons chia seeds or flaxseeds
Wet Ingredients
- 1/2 cup nut butter (peanut, almond, cashew, or sunflower seed butter for nut-free)
- 3 tablespoons honey or maple syrup
Mix-ins (Optional)
- 2 tablespoons mini dark chocolate chips
- 2 tablespoons dried fruit (cranberries, blueberries, etc.)
- 2 tablespoons shredded coconut
Optional Flavor Variations
- 1 tablespoon cocoa powder (for Chocolate Lover’s)
- 1 tablespoon spirulina or matcha powder (for Superfood Boost)
- 1/2 teaspoon cinnamon, nutmeg, or pumpkin pie spice (for Spiced Delight)
Instructions
- Combine Dry Ingredients: Gather rolled oats, protein powder, chia seeds or flaxseeds, and any chosen spices. Mix thoroughly in a large bowl to ensure even distribution of flavors and textures.
- Add Wet Ingredients: In a separate bowl, stir together your nut butter and honey or maple syrup until smooth and creamy to act as the binding agent.
- Mix Everything Together: Gradually add the wet mixture to the dry ingredients, stirring until a sticky dough forms. If too dry, add more nut butter or a splash of water for proper consistency.
- Add Mix-ins: Fold in chosen extras such as chocolate chips, dried fruits, or shredded coconut for added texture and taste.
- Shape into Balls: Using your hands or a small cookie scoop, roll the mixture into evenly sized balls about 1 inch in diameter for perfect snacking size.
- Chill and Set: Place the balls on a parchment-lined tray and refrigerate for at least 30 minutes to firm up and hold together when eaten.
Notes
- Choose unflavored or mildly flavored protein powders to avoid overpowering natural tastes.
- Keep ingredients at room temperature, especially nut butters, to make mixing easier.
- Do not overmix to maintain a tender, slightly chewy texture.
- Roll balls evenly sized for consistent bites and easy storage.
- Store protein balls refrigerated to maintain freshness and prevent stickiness.
Nutrition
- Serving Size: 1 protein ball
- Calories: 100-120
- Sugar: 5-7 g
- Sodium: 30-50 mg
- Fat: 6-8 g
- Saturated Fat: 1-2 g
- Unsaturated Fat: 4-6 g
- Trans Fat: 0 g
- Carbohydrates: 10-12 g
- Fiber: 2-3 g
- Protein: 5-7 g
- Cholesterol: 0-5 mg
Keywords: no-bake, protein balls, healthy snack, quick snack, no oven, portable snack, vegan option, gluten free